Video Production

Case Studies, How To's, Video Production

How Much Does It Cost To Produce A Video?


Simply asking “how much does it cost to produce a video?” is a bit like asking, how long is a piece of string and often our answer, “well, it depends” is insufficient. However, seen as we get asked this question so many times from friends, colleagues and our clients alike, what a fitting way to start this blog by outlining our approach to understanding video production cost. If you’re in the creative production industry or you’ve stumbled upon this post wanting to know what you should be charging, with the following steps, you’ll be better equipped to answer that old chestnut of “how much?” and hopefully avoid any nasty surprises along the way.

Likewise, if you’re here looking into having video produced for your company to boost your brand reach and drive up sales, our hope is that this post brings insights into how a production studio develops their overall pricing model to establish their base video production cost.
artboard-1

1. Know your worth

It’s vital that you know what you are worth and how much you are willing to work for per hour.  It’s great to produce work, but if you need a certain amount each hour to make sure you can pay the rent and cultivate a life outside of creating content, then you need to put a fair and reasonable price on your time.  My guide, even if you are just starting out, is; aim to price your hourly rate out at double the amount that you want to have left over in your pocket at the end of the day.  Even with a small startup, you will already have a camera, editing software, computer and a home office setup and all of that costs you money.  You need to consider tax for your region and country and you need to make sure you are putting aside some money for a rainy day.

As an example, if you know you want to pay yourself $20 per hour, your charge out to cover all of the above might be closer to $40 per hour.  If you know you want to pay yourself $40 per hour, your charge out would be closer to $80.  It may seem like a lot of markup, but you will quickly start sinking if you are not able to put aside a good portion of your business income to meet your financial obligations as a freelancer and have a little left over to help build your business.

2. Know how long it is going to take

When I started out producing video content, I didn’t have a good handle on the time it would take me to complete a given task.  That was to be expected as it’s really only once you get a number of jobs under your belt, that you begin to understand the actual video production cost and exactly how long things really take.  That said, however, it’s not enough to just make up a number in your head. You have to plan, to the best of your ability, the time it is going to take you to conceptualise, script, storybaord/shotlist, shoot, backup footage, edit, choose music, colour grade, master audio, export, upload, review, apply review changes and deliver the final film.

I start with figuring out a basic concept, and then thinking through the main shots, or A roll as we call it, that I’ll need to bring my concept to life.  Then I think of all the secondary shots, the B roll, that will be shot to support the overall concept.  This process happens after we have met with a prospective client, so we have all the information we need to make informed decisions about concept and delivery obligations.  I usually draft up a base concept outline and shot list before I go back to the client with a short brief and film treatment.  Keep in mind, with new prospects, all of this work is done absolutely free, which is why you have to include the “cost of sale” time in your business overheads and why your hourly charge out rate should be around double your take home pay, as I explained earlier.  Once the client has seen, read or heard the concept, I then collaborate with them to ensure they are happy with the final concept and shot ideas and only then I can have a firm idea on the time it will take to produce the content required.

Once the shoot is mapped out, anywhere from 1 day to a week and beyond, I think through the amount of time it will take to backup, sort, and clean up all the footage.  This is before you even get to editing stage.  The editing stage can also be difficult to figure out when just starting out, but over time you will get more efficient and you will begin to know how long it will take.  In my early years, I underestimated the time it would take to give the final draft edit a full colour grade.  Now days, with much more proficiency in Davinci Resolve, I am a lot better at estimating the time it will take me to colour grade.  But I would say in the beginning you almost need to factor in as much to colour grading as you do to editing time.

3. Know your clients expectations

This is perhaps the most difficult to navigate in pricing up a job. In the early days, I had a lack of confidence talking face to face with my clients about their investment in video and in my company. This meant our pricing often suffered at the hands of the inevitable squeeze.  What I mean by that is, some clients will squeeze you down on price, right from the outset, and why should they pay more than they have to for your services, right?  The issue was, I was too busy stressing over how much I was going to charge them, rather than proving value in what I was offering them, and believing in my own expertise.  Another problem is, I was often getting my initial communication wrong.  Instead of projecting the value of video in a crowded digital landscape and communicating how video is “THE game changer and you best get on board with it”, what I was saying is, “I need you and my company needs your business” or “please give me your business, it’ll be great for us to work with you.” After 10 years in engineering you’d think I would have learnt how to better position myself, my company and my services, yet only after about a year in freelance creative, did I realise that I needed to make sure my prospective clients completely understood the value of what I was offering them and allow their expectation to be solely formed on that basis alone.

4. Know how to start the budget conversation early.

I used to dread it in the beginning, but I knew instinctively that I needed to raise the question in order to not be stabbing in the dark with our initial video production cost.  Some clients are open and honest about their budget expectations and others have been a completely closed book.  To be totally upfront and if any future clients are reading this, it is so much better for us when our clients share their thoughts around price and express their video production cost expectations.  The reason is that some clients have a perception that video is cheap and that they are only expected to pay for unskilled work.  For those types of clients, the budget conversation is a perfect time to help them understand how hard you’ve had to work to get to where you are today, and also give them insights into what video will do for them.

It helps to have case studies at the ready, to prove value to the client and show them what their “investment” in video (not their “cost” to produce video) is worth to their overall bottom line.  For clients who have the finances and have thought about marketing the video after it is produced, the budget conversation is relatively pain free.  A couple of times in meetings I’ve broached the budget subject and have been given a figure and all I needed to say in response was, “Great, I think we can manage with that.”  Those are great days, when you are on the same page and ready to work together from the outset.  Other times I have clients tell me that “money is not a problem” only to have them completely MIA after submitting our final investment proposal.  I would advise to use caution if a client mentions money more than once in a meeting.  From my experience, this has often meant that money is a problem and they’ll likely balk at any price point you offer.

5. Know how to justify each item in your final pricing

This is something that helps when questions are often raised about video production cost and your specific pricing.  This generally happens when the client is not familiar with all the technical aspects of video production.  It is for this very reason, we provide a complete breakdown of what we offer in a line by line investment outline as part of our concept proposals. This ensures that there are no hidden costs and there is full transparency with what we are charging and why we need to charge for it.  If there is ever a question raised about any line items, we can explain and prove value on every front.  We can also re-assure our clients that everything is listed and there will be no hidden costs if they proceed with us on the video production.  Although the price may be high in the mind of the client at first, they generally feel at ease when they understand the time and costs associated with the complete investment breakdown.  We’ve found that this empowers them to weigh up all their options and make clear decisions about moving ahead with the production.

We don’t convert on every proposal we prepare, but you might be surprised to know how little we have received knock backs on our video production cost when we follow the above process. At the end of the day, as long as the video production cost is fair and reasonable and you can prove value in what you are offering, there should be no problems in you converting prospects into happy clients.  Once they have the knowledge on how video can truly revolutionise their business, they will be with you for many years to come.

Case Studies, Video Production

The Power Of Video


Video has fast become the go to platform to develop cutting edge and authentic marketing campaigns online. Moreover, much of the power of video stems from how hard wired it is to our individual social media landscapes and personal communication devices. There is simply no denying the huge potential online and social media reach a quality video truly has.

The Power Of Video - Header 01
Pendula explain the power of video in this blog post. This will help you harness the power of video for your Gold Coast Business. Contact Pendula today.

It’s not just our opinion either. A recent body of research from VidYard suggests video is one of the most effective marketing mediums online. Equiped with such research, businesses, industry experts and even individuals with a message to tell are dedicating a larger portion of their marketing budgets to developing high impact online videos. And in 2017, you should be doing exactly the same.

Richard Tiland of New Evolution Video suggests that “video is beyond entertainment” and goes on to say that “it has become a critical component in business, politics, communication, social media and even in music.” Tiland concludes that “the power of video is the ability to effectively share beliefs and impact audiences from the comfort” of ones own surrounds [Forbes.com, June 2014].

Diode Digital discovered that 60% of site visitors will watch a video if available and Forrest Research found that a website is 50 times more likely to appear on the first page of a search engine’s results page if it includes a video [Boast.io, Oct 2015].  Yes, that was their findings, video could boost your sites google ranking 50 fold.

Furthermore, according to Cisco [Cisco.com, Feb 2016], “online video accounts for 50% of mobile traffic, and is predicted to become 75% by the end of 2016.”  This means that video can penetrate your potential customers while they are on the move, and isn’t only effective when they are in front of a computer screen.

We believe in the power of video and it’s clearly become the final frontier of content marketing. And this isn’t just because we love to create it for our clients, rather, it’s because we understand that you can communicate so much to your audience in such a short amount of time through a quality video. Much more than lines of great copy on your webpage, video helps your customers visualise themselves engaging with you, your brand, product or the amazing services you offer, and this is why video is incredibly powerful.  It paints a mental picture and casts a vision before any decision process has even begun.

By linking video to social media landscapes, it can also engage with potential customers who may not have ever known you or your business existed prior to coming across your video on their social feed. You see, video is actually a catalyst that kickstarts the buying process and connects emotionally with audiences, so much more so than your website or cold calling ever will.

We’ve spent the last 2 years educating and delivering high end and engaging content that our clients have used as powerful selling tools that have boosted market reach and driven up sales. We believe it’s the only way to market your business in 2017 and beyond!

Leave us a comment below if you think so too, we’d love to hear from you.  Or get in touch today to discuss how you can harness the power of video for your business.

Case Studies, Marketing, Video Production

The Balance of Storytelling and Marketing


1 Comment

A good story is crucial. Stories are a way we can connect with each other on an emotional level. In the same way, stories used in video connects the viewer with a brand or idea. It is also what compels us to keep watching. It develops a simple but captivating message that replays over and over again in our minds.

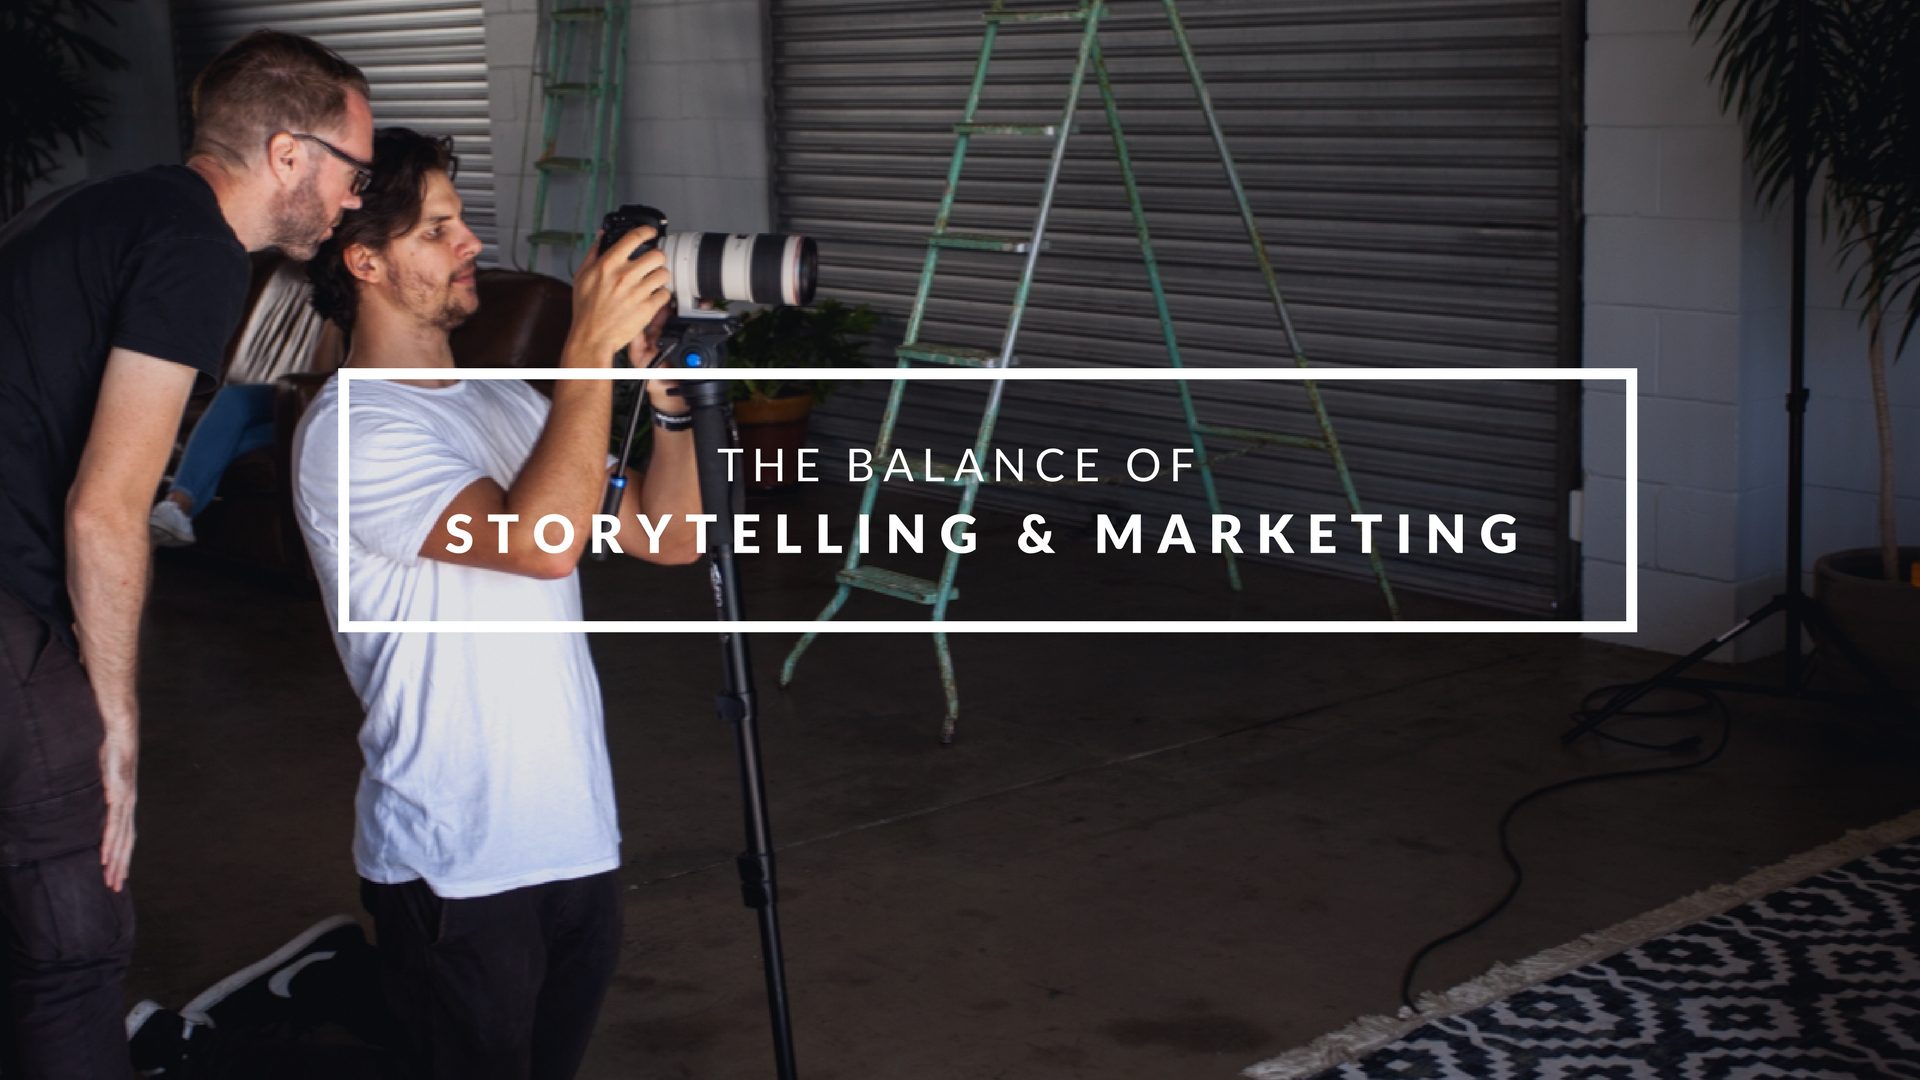
Header image of Pendula Team

As a business to business production agency, we work across a variety of industries to develop an engaging through line within the videos we produce. One of our key practices at Pendula is creating a strong connection between video marketing and storytelling – and we take this approach with almost all of our corporate clients. We are in the business of developing your video marketing needs, but we are passionate about defining a bold story tailored to you. When we’ve previously talked about The Power of Video, we focused on video content and its close tie to social media. This time we want to shift the attention to the storytelling that makes up that content and how the Pendula team work to balance this with marketing goals.

To create this style of visual storytelling we typically break down a number of factors.

1. The Nature of the Client’s Business

As we produce video for such a number of different enterprises, we at Pendula are privileged to challenge ourselves with a number of unique and varied approaches. This is usually dependant on the nature of our client’s business. What about you? Are you marketing a tangible product, an experience or an idea or perhaps even yourself? We love that we are able to work with our clients to define this and then begin crafting a unique and creative approach to highlight it.

2. Video Objective and The Narrative

The first step before any script has been written or any storyboard produced is to determine the overarching message of the video we’ve been engaged to create. Corporate video can sometimes stagnate by marketing stipulations and whilst these can prove to be restrictive at times, our aim is to incorporate them organically. To do so, we ensure that we centre the production around the fundamental objectives whilst linking it to highly engaging narrative and well executed creative. It’s no surprise that authentic narrative is a powerful force in our modern times. Some even believe that it’s a major reason why Walmart and GE are tanking yet Apple and Salesforce are seeing continued success. By collaborating with you to simplify and consolidate your objectives we then work hard to craft your story to support this. Authentic story truly benefits video marketing due to its ability to evoke a strong response. Whether that response is happy, excited, or one of intrigue is usually different for each of our clients, yet it is imperative as it creates emotional resonance within the viewer.

3. The Call to Action and Engagement

Crucial to the marketing potential of video productions is the call to action or CTA. It’s one of the most useful ways to track viewers engagement with the content as well as their receptiveness to the story and the overall return on the investment in a particular video. It leads the viewer to respond in a certain way, and gives them something to do after viewing our videos. Obviously, the CTA is vastly different depending on the objective of the client and this request for the viewer to take action can be offered in many different ways. Take vlogging content for example, it’s usually as simple as requesting viewers to like, subscribe, share and comment. This fosters a branded relationship with the client and their viewers. For corporate content a different approach is used, depending on the objective of the video and the client’s business, the CTA can range from signing up to a newsletter, clicking through to view a website for more context, or attending events and purchasing products. The narrative acts as an important vessel to deliver this request to the viewer. It’s through an emotional connection created by the storytelling narrative that engages with the viewer and compels them to follow through on the requests.

While some may think incorporating marketing objectives can affect the authenticity of a story, the team at Pendula work hard to balance the two in order to create a visually compelling narrative that promotes the client’s objective. Storytelling is an ancient pastime and it has taken on many forms through its continued evolution. Our goal is to adapt this tradition for the evolving video marketing practice and create a cohesive relationship between storytelling and marketing.

Gear, Video Production

Our Run And Gun Video Production Gear


1 Comment

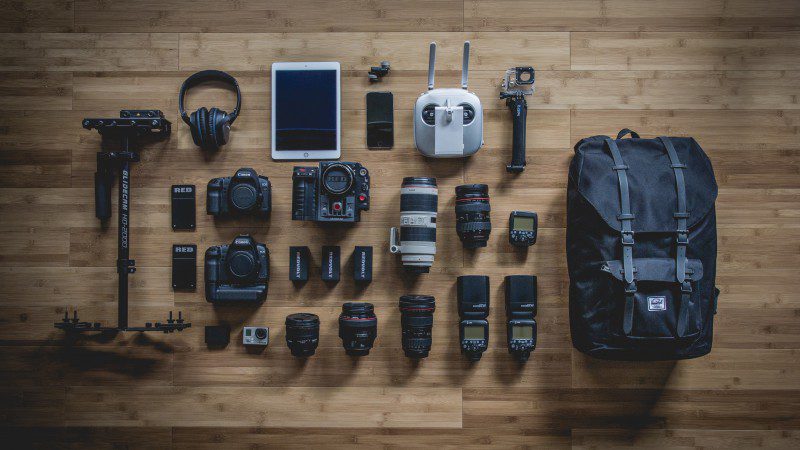
Every production studio needs a solid “run and gun” setup including all the right video production gear.  This is what we use for events where you are shooting video for long periods of time, basic interviews and even some higher production level stuff where tight budgets are a factor.  In this post i’ll be outlining the video production gear we use for majority of these types of productions, so stay tuned.

artboard-1-blog-2

Cameras

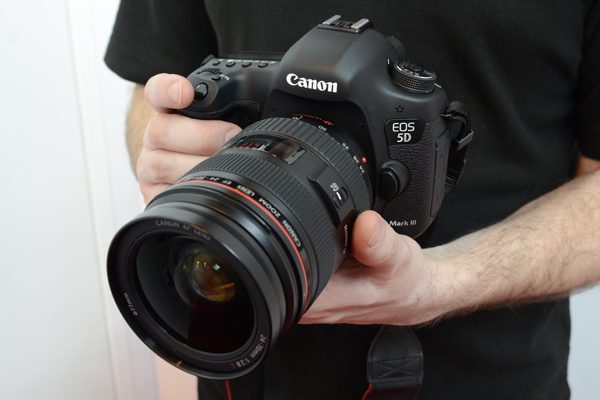
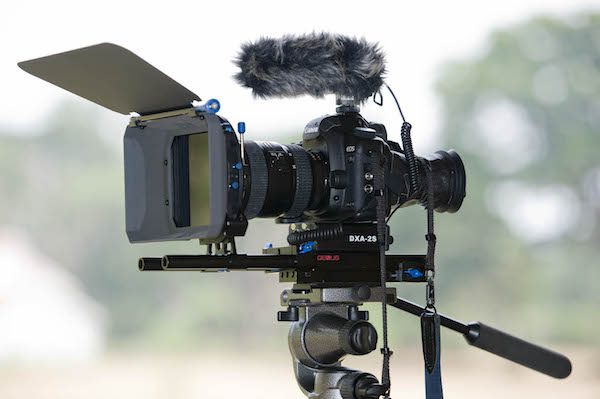
More often than not we use Canon DSLR’s and at times we push the boundaries of what’s possible by using piggyback firmware upgrades available from Magic Lantern.  Our go to run and gun video production gear workhorse is a Canon 5D Mark III.  What more can we say about this camera, it is beautiful.  For a DSLR it has a super solid image and for all but long form interviews it really performs exceptionally well.  Matched to some Canon L series glass and it’s hard to beat this camera for ease of use, form factor (especially nice for events) and cinema like image quality.  It is not without limitations, yet even on some bigger projects, with the right lighting, we have found it to really stand out from the rest.

dsc6365

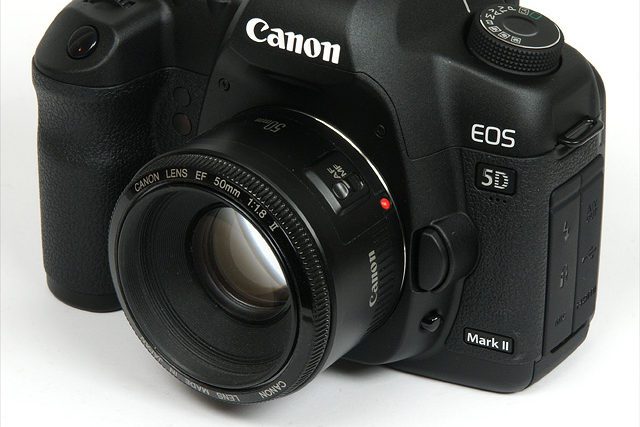
The other camera in our video production gear run and gun kit that has been a real workhorse is the Canon 5D Mk II.  We often say about this camera, after I resurrected it from taking a quick dip in a river once, that the water must have done something to the sensor as the image on this old girl is absolutely stunning.  Yes it’s a little noisier in the blacks, generally has some moire in certain situations and has much more pronounced rolling shutter than the 5D Mk III. And it’s also a little harder to shoot with in dark scenarios, but honestly, there are so few that would pick the difference between this and the image of the Mk III, we even find it hard to notice ourselves sometimes.

canon_5d_film_setup

Lenses

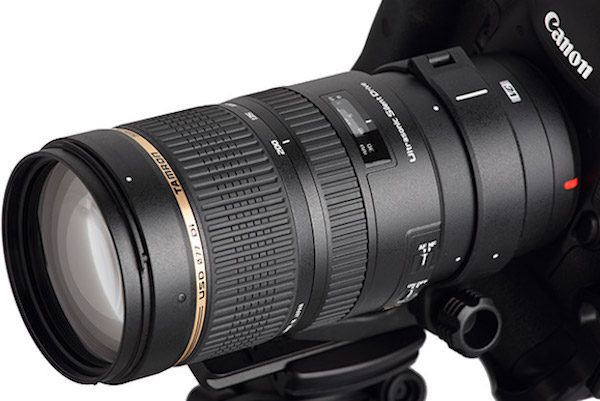
We generally change between two different lenses on run and gun type shoots.  The ‘nifty fifty’ Canon 50mm 1.8f and the Tamron 70-200 f2.8.  Throw in an L series 17-40 f4 for all those wider shots and we consider this enough glass for just about any run and gun type scenario. We use vari ND filters and have stepper rings on all our lenses to suit the same size of vari ND threads.  This simplifies the process when switching out lenses and changing over the ND filter.  We have a stack more lenses in our kit for other shooting scenarios but would not leave home for an event without the three mentioned above.


SONY DSC

tamron-70-200mm-vc-lens-1


Monopod/Tripod

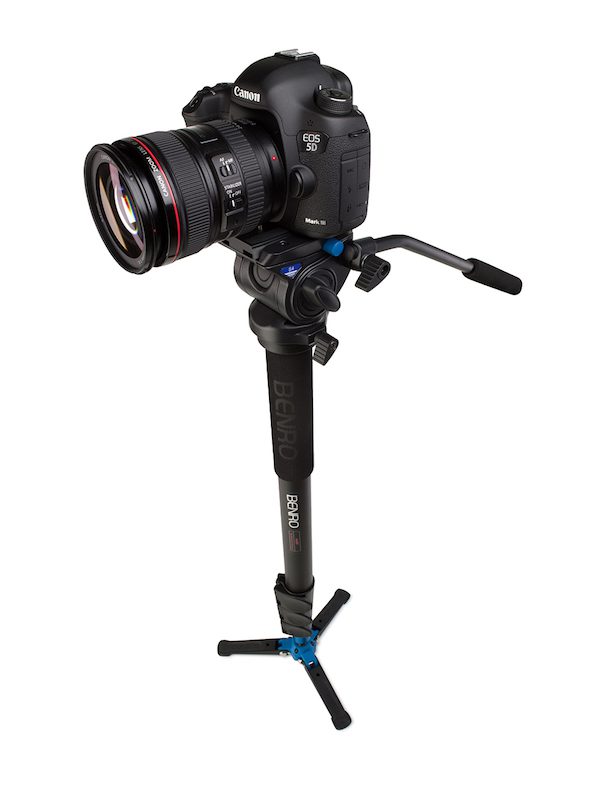
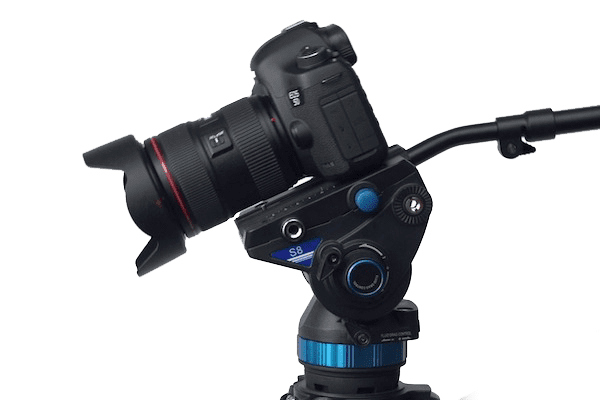
We love our Benro S4 Monopod.  It’s really awesome.  We couldn’t do what we do on a run and gun setup without it.  It allows for great control of shots with fluid pan and tilt ability and an adjustable base to shoot off, it’s a must have item for budding event and short form story videographers.  For more interview style, story based productions, we use a Benro S8 tripod setup.  I can’t emphasise enough what a good tripod setup with a quality and stable fluid head can do for your production quality.  We love all our Benro gear.

a48fbs4_topdowncam_03benro_s8_tripod_final


Memory Cards

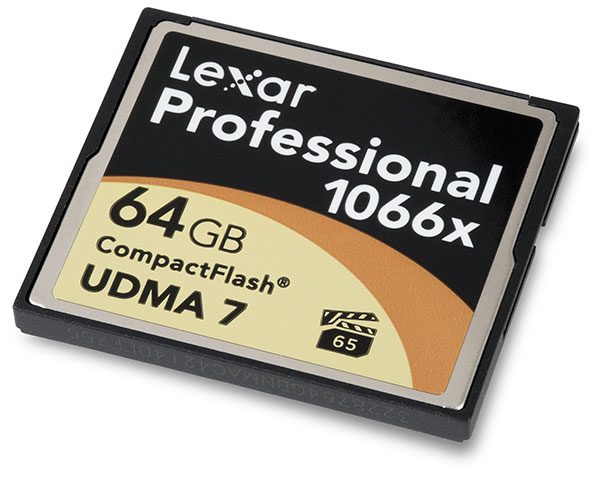
We pretty much exclusively use Leaxar CF cards and we have a 32GB Sandisk SD for the 5d mk iii.  We’ve had great success with the Lexar CF’s, have pushed them hard with ML RAW and never had one die on us yet. The size of the cards we use are some 32 and 64 GB and we often use ML RAW so we shoot that on Lexar 1066x.  These can shoot continuous 14 bit RAW on the 5D Mk iii (with Magic Lantern set to full HD and some settings tweaks) and close to it on the 5D Mk ii.

lexar-professional-1066x-64gb-cf-card


What are we adding next?


The next addition to this kit will be the 1D x Mk ii.  It shoots native 4K in camera and shoots 1080p up to a super slow 120 fps.  This is what we are saving for and we can’t wait till it becomes part of our “run and gun” arsenal.

Thank you so much for stopping by, and if you got this far, why not leave us a comment about your run and gun setup below?

Michael

How To's, Tutorials, Video Production

Taking Audio From Premiere Pro CC to Adobe Audition CC and back again.


It’s Michael from Pendula here and I’m just wanting to show you my video editing Gold Coast and Brisbane workaround from taking audio from Premiere Pro into Adobe Audition and then back into Premiere Pro for export.

Here I have presenter Kelly for some work I am currently doing and basically what I want to do is this is the raw audio recorded on a rode NTG3 as you can see here in the bottom of the timeline, i’ll just expand that out for you so you can see little bit better. I’m wanting to process this all at once. So premiere can do that, that’s fair and valid but I like to use Adobe Audioton, so I would like to show you my workaround and this is the way that I do it. So what I do is I select the audio that I’m wanting to, just the first clip in the sequence, that I am wanting to export. Then I go edit and, this feature here, edit in adobe audition. It’s not clip, it’s the whole sequence. I select the whole sequence and what it does is it brings up the dialogue box here which is saying, this is what I want the name to be and it’s going to take the entire sequence, and, it’s going to send through dynamic link which is a great feature that links together adobe sweet programs. I don’t want to render any audio clip effects because I have none on anyway and I don’t want to send the clip volume keyframes because again I have none on and I’m going to open it adobe audition so make sure that is selected. I’m going to click ok and that is going to bring up my adobe audition window. Now this is what it looks like in adobe auction and here is my video through dynamic link and here is the audio. What I am going to do is right click on the audio and each of these currently are individual audio clips and what I am going to do is bounce to new track and the selected track only. So I am going to bounce that down to a completely new track and here it is, bounce one. What I want to do now is I am in what is called the multitrack view which shows me all the tracks in this session within audition so what I want to do is go across to waveform and now I am looking at my newly bounced waveform of Kelly’s audio.

What I do is I just clean up her audio, I remove breathing and remove silence clips first up and that’s because we were recording this in no a perfectly quite environment so there is some residual noise within these parts so I just want to remove those. Sometime on audio that is a little bit more of a problem I’ll do a noise reduction and sometimes that works better to first noise reduce but in this case the audio was pretty good and their wasn’t much noise on these days but I will just take out a little bit of this breathing. What I have done is I have mapped the silence command, creating silence, to the number 5 key on my keyboard so that means I can just select the audio and instead of, what you would normally do is right click silence and you can see there it’s number 5 so then I just click 5 and it creates silence so that’s a really quick way to just give a clean up of audio. Sometimes I’ll listen to what I am cleaning, this little blip here is a little breath, little ahhh. sometimes you need to leave them in just to give better diction with what she is saying but usually I try and remove as much of those little breaths and stuff as possible.

I’ll just work on that and I might just skip ahead for you and we’ll pick up once I have gotten through and silenced this audio and we’ll pick up and I will show you process from then on.

Right so I have just got to the end and I am just creating my last bit of silence on the last part of the video editing clip there so I am happy with all of that now silences and it is sounding good so I am pretty happy. What I am going to do now is I am going to just drop down to amplitude and compression and I want to just do a pretty crude single band total compression on this now I am looking here and I want to compress down to the smallest piece of audio I have in this recording. There was a second camera shot where the audio is a little different, a little lighter, so here in this section in the centre here you can see minus seventeen, minus eighteen is about what I want to compress down to so I have got those settings from a previous audio render I did so minus seventeen on the db for the threshold, the ratio I do three to one ratio attack I do one and release one hundred and fifty milliseconds. That seems to work pretty well for this type of audio recorded on the NTG3 Rode mic which is great quality audio to work with. I am going to apply that and that gets me down nice and low. There are still some peaks here and here so I am going to go again and compress that down again with the single band compressor again. And again not worrying too much about this as I know it is going to sound ok in the end so that’s really my compression. Then I want to normalise so I am going to go back and take normalise and process to minus one db and process that. Just going to have a listen, that’s sounding good, not too essy, it’s quite nice, Kelly has a great speaking voice. So all I am going to do is apply her preset. Just for the sake of it all these are is some parametric EQ’s just removing minus four db from frequencies that I think aren’t great within this room and the mic arrangement and that always changes but I am basically going to take them off. So apply that rack and have a listen again and I can hear, maybe you can hear that maybe you can’t but I can hear that her voice has cleaned up a little bit in that. That’s basically all I worry about with that.

Basically I don’t even save when video editing like this actually, what I do is now I go back to the Multitrack view and here is my session and I want to solo out the bounced track that I created and that I edited and did all the eq and the work in. Now multitrack has this cool feature export to adobe premiere pro so I am going to export now back to adobe premiere pro so mix down session i want a stereo file and open in adobe premiere pro, sorry, I am in audition now of course.

So I export that and you’ll see it’s going to export and run and now it comes back into premiere and it tells me here copy audition track and I want to copy that to my current sequence. That’s going to drop that audio as you can see here down at the bottom of the screen in my sequence. Now I want to keep that sequence as my original so I am going to go to the project window, I’m not sure if you can see that as it is off screen on my other monitor, but in the project window I’m going to duplicate that sequence and then I’m going to call that sequence video 5 replaced. Now I’m going to open that up and you should see that pop up here in the sequence on the edge here. Now the reason I do that is because I want to keep the original audio, always want to keep the original audio. I’m just going to close out that sequence now and in my replaced sequence I’m going to lock the visuals, I’m going to select and delete the audio and I’m just going to take the audition session and drag it up into my audio space under Kelly. Now I have Kelly and I have her audio all cleaned up underneath.

Hopefully that’s helpful for your video editing guys. That’s my work though from taking premiere audio in a timeline like this, a simple talking head timeline, taking into audition, doing some work with it and bringing it back into premiere pro. Thanks for watching and I’ll see you next time.

How To's, Tutorials, Video Production

Podcast Patch File for GarageBand


If you are based in Melbourne and new to podcasting and you are just wanting to try it out and have a go at it, there is a great Mac based program that has assisted us to produce great quality productions for our video production company Melbourne based clients. That program is GarageBand.

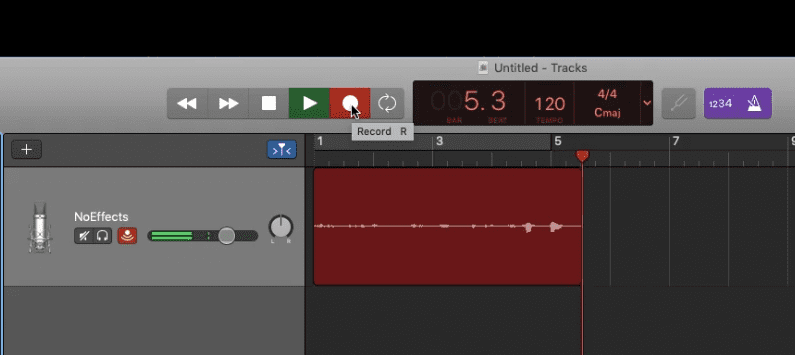
After setting up Pendula video production company Melbourne’s home base and moving myself from QL down to the city of Melbourne to produce high end and engaging videos and film productions, I realised that our existing clients needed some way to setup their own GarageBand in a way that took off all the audio processing so that they could provide me in Melbourne with high quality podcast audio that I could then produce for them on my end. In order to achieve this I went ahead and created a Patch file that allows my video production company Melbourne and podcast production Melbourne based clients to turn off all effects with just one click on the patch file menu.

I thought that this might be helpful to other Melbourne based video and podcast production companies so I have provided it below, please feel free to use it for your own video production audio production and Melbourne based film productions and also use it to help you produce amazing sounding audio.

I went ahead and created the below PATCH for you to install on your computer for GarageBand to remove all the audio effects with a single click.

Firstly click here to download NoEffects.patch file and then check out the video above. Note: the link will directly download NoEffects.patch file and it will then be available in your Downloads folder in Finder.

I hope this helps you to get great audio out of GarageBand for your upcoming Podcast.